Virtual machine with a static IP.
World of translation : Technical documentation
7 Nov 2012, 14:47
5
4553

In Internet there is no enough information on this subject, that is why I wrote this manual. Why all this is necessary? Let us assume, that on a virtual machine you have a web server and you want to make it available always by one local IP address (the problem is particularly actual, when you have a lot of network devices), and not by IP address, which is assigned by DHCP (in case if it ever is and turned on).
Instruction:
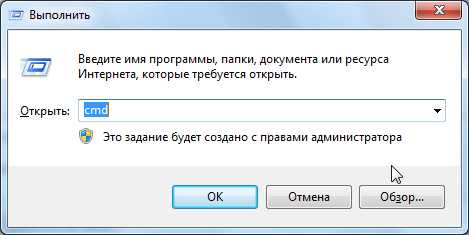
- Click Win+R, in the appeared window type "cmd" and click ok. Next console should be opened.
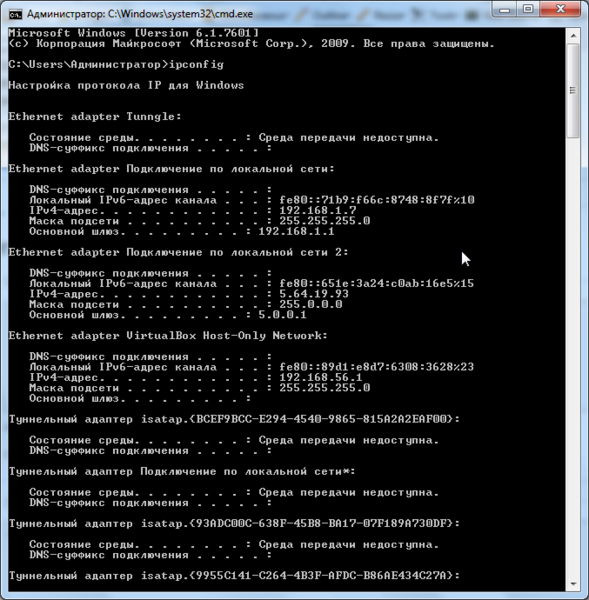
- In the opened console type "ipconfig" and to look for adapter, which we need, in this example this is: "Подключение по локальной сети" (Local Area Connection).
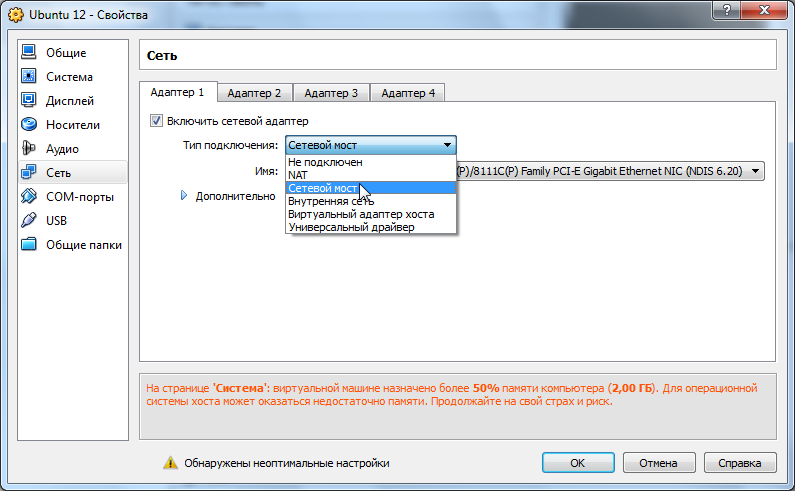
- Next we run the VirtualBox, in the properties of the desired virtual machine we go to the section "сеть" (network). In this section, open the desired adapter and change the connection type to "Сетевой мост" (Network bridge).

- After that, we run the a virtual machine, in this example - its Ubuntu. We go to the connection settings.
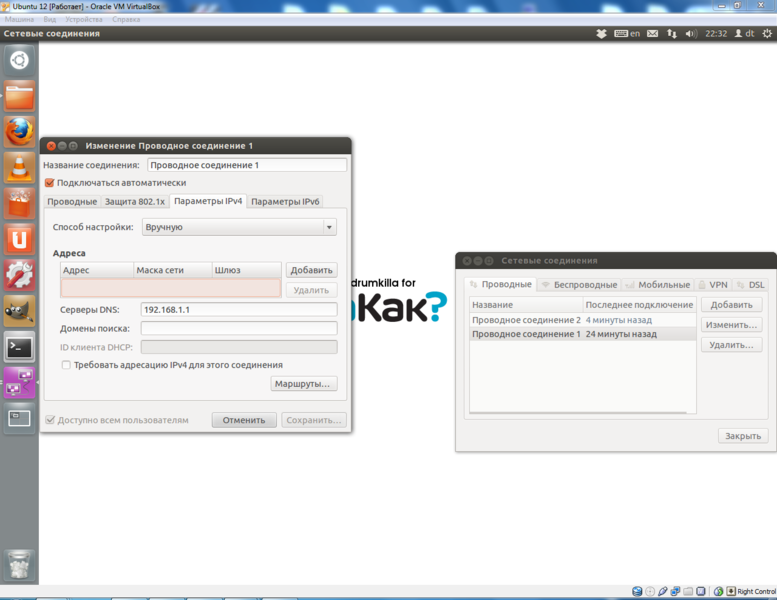
- In the settings of our connection, click "изменить" (change) and go to the tab "Параметры IPv4" (IPv4 parameters), here you need to choose configuration method "Вручную" (Manually) .
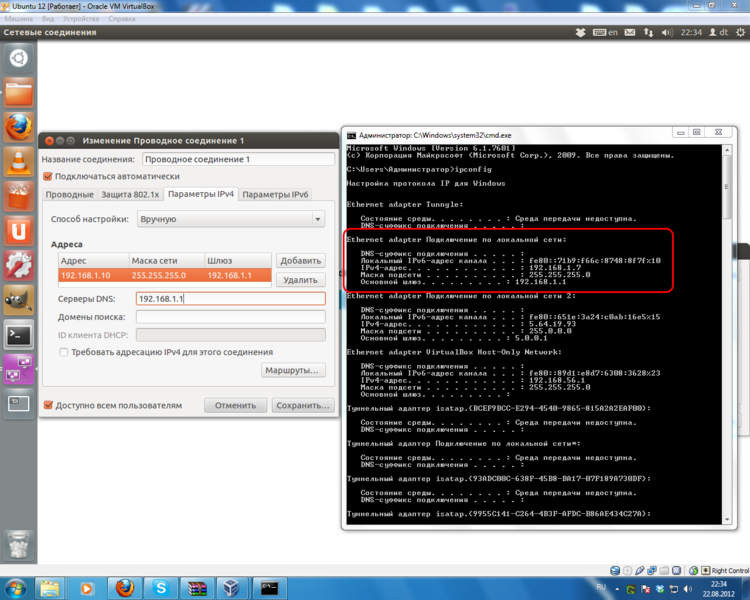
- Next in the list of addresses you need to click "добавить" (add), and copy here the data which you have received in the Windows console, and change IP address to the one that you need, in our example its 192.168.1.10.
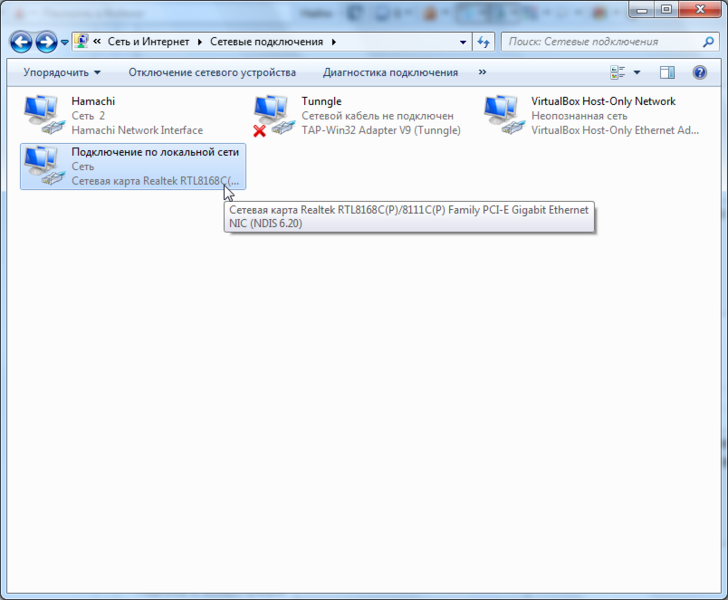
- Those, who have installed Windows Vista or Windows 7 on their virtual machines should do the following: go to "Панель управления" (control panel), then go to "Управление сетями и общим доступом" (Managing Network and Sharing), tab "Изменение параметров адаптера" (Change adapter settings) and here we need to select the desired adapter.
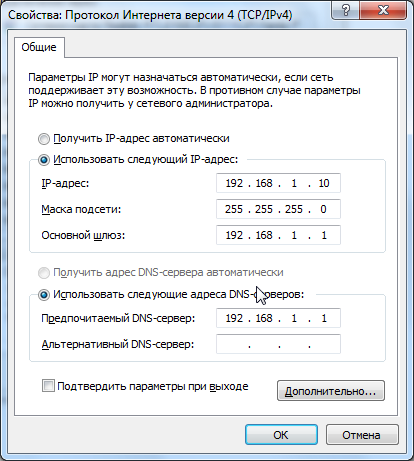
- Those, who have installed Windows XP on their virtual machines should do the following: go to "Панель управления" (control panel), then go to "Сетевые подключения" (network connections) and here we need to select the desired adapter, then you have to go to the properties of the adapter (click the right mouse button on it and choose "свойства" (properties)) then click 2 times on "Протокол Интернета версии 4" (Internet Protocol Version 4). Then choose "Использовать следующий ip адрес" (Use the following ip address), and insert here the data which we have received from the Windows console, and in parallel change the IP address to the one that we need.
All done!
Use the following ip address